Wednesday, August 17, 2016

Wordless Wednesday

Wordless Wednesday, Counting Pinecones

Alyssa starter her Senior Year this week and came home with reward for her accomplishments for her last three years of JROTC.  She was promoted to 1st Lieutenant  and made Flight Commander and was awarded her beret.  We are so proud of you sweetheart!! 


Tuesday, August 9, 2016

Tips for Planning Your School Year (5 Days of Homeschool 101)


One of the things I struggled the most with when I began homeschooling was what one would have thought was the simplest - planning.  I honestly thought that that would be the easy part - that I would basically just start each book at the beginning and continue throughout each day til the end of the school year.  Ooh how naive I was!!

We are in our third year of homeschooling and if I want to be completely honest with you, it was only since January of this year that I actually learned how to plan ahead of time and keep those plans organized. Most importantly, it's taken me those three years (actually, four if you count how miserably I failed teaching my son Kindergarten and decided to hold him back!!) to actually follow that schedule and now have it completely thrown out the window in the first week. 

These are a few tricks that I have learned over the last few years that can hopefully help you with your planning as well.

#1 Don't Wait Til the Last Minute

There's nothing more unnerving then to spend your Sunday night frantically trying to figure out a lesson plan for the next morning, or figure out how your going to do a certain activity without a necessary ingredient that you just realized you need.  I've been there, I know how it is. 

I try to schedule my school weeks at least 3 weeks in advanced, sometimes more. By scheduling a few weeks in advance, it allows me to make sure I have all materials needed for special projects or to allow time to get those materials before I need them. 

#2  Allow for Uninterrupted Time for Planning

Sometimes, this one is easier said than done... But it is very hard to make a lesson plan with three kids
screaming "MOM!! She's looking at meeeeee!!" every 5 minutes.   Because I do plan lessons a few weeks in advance, that allows me to only need to spend about 30 minutes each week to schedule for the following week. Typically, I can accomplish this while catching up on TV shows once the kids are asleep but there are times I can get my husband to watch the kids for 30 minutes so I can sit at the Starbucks nearby, enjoy a latte macchiato or a white chocolate mocha and knock out my planning while enjoying some me time without the stress of interruptions.  While my initial planning might take me a few days to schedule out, once I have the backbone of my planning done, 30 minutes is more than enough time to knock out what I need and be done with it.

#3 Research and then Purchase a Good Planner

There are MANY planners on the market right now, from the luxury of the Erin Condren style planner to a simple Walmart special and even a print your own planner, and no two people use any of these planners in the same way.  To complicate it even more, there are many various digital planners available online.  Some of these various planners are generally designed for classroom teachers while others are very specifically designed for the needs of a homeschool class.  Before purchasing a planner sight unseen from a website, be sure to read reviews and look at their sample pages to see which style you like, sign up for the free trials for the digital programs and check out how they work.  Once you find the planner that fits your style, it will make things so much easier. 

#4 Create You Planner's Backbone

In almost every planner, there are weekly scheduling pages that have a column on the top and another column on the side.  I call the side column my planner's "backbone" and this is where I line up the subjects that I plan on teaching each week.  As these subjects do not change and they stay consistent, they help me to make sure I have scheduled all necessary courses each week.  My current "backbone" schedules as : 1.Spelling/Phonics/Reading and Poetry, 2. Math  3. Handwriting, Copywork and Foreign Language  4. Natural History/Science/Nature/Bible  5. History and Tales  6. Literature and Tales and 7. Geography/Music/Art  .  By having this backbone, I am able to see if I have too much planned for one day or not enough planned on the next day. It also allows me to quickly fill in the next week by following the same format each time I plan.  

#5 Keep Two Planners

I keep two planners at all times - my "ugly" planner and my official planner.  The "ugly" planner is basically my rough draft planning. In it, I write down all that I want to do each week, the projects I hope to fit in, ect.  The Official planner is what I use to write down what we actually did at the end of each day.  Typically, I use a printable planner (I got mine as part of my membership from SchoolhouseTeachers.com) and I will just print out a few weeks at a time and I save my store bought planner as my official planner.  The "ugly" planner allows for me to make spur of the moment adjustments while avoiding having to mark out or make corrections in the other planner.  That way, if I am ever asked to show documentation as to what the kids worked on throughout the school year, I have a planner that shows EXACTLY what was accomplished on each day. 


#6 Keep On Track By Checking Off Things As You Go

Once I have my weeks scheduled out, I do my best to follow what I've scheduled.  As we complete each task, I always put a check mark next to the assignment in my planner to know that it's completed.  This keeps me from accidentally skipping over something absentmindedly. At the end of the day, I double check to make sure everything either has a check next to it, a circle indicating that I need to fill it in elsewhere during the week, or boxed to show that we started it but I need to allow for a few minutes the following day to allow for completion.


Everyone finds their own way of doing things when it comes to planning, but hopefully a few of these tips will help make planning your homeschool year less of a chore.  And be sure to check out many of the other postings from the Crew today as they each give their own suggestions, recommendations and helpful tips on Planning as well.  

5 Days of Homeschool 101

Monday, August 8, 2016

Gearing Up For AO Y3


Back in January, we made a trial switch to the Charlotte Mason method of homeschooling.  I admit, it was a very scary change for us as I had it in my head that the kids needed to a certain amount of worksheets and busy work each day to meet some imaginary line for being a quality education. But the truth is, trying to do all that wasn't productive for us - the kids fought against me, they were unhappy and each week we were getting further and further behind.  During our Christmas break I spent time researching a better way of doing things and the Charlotte Mason method seemed interesting.  We tried it, the kids liked it and we have decided that Charlotte Mason is indeed for us.

Here we are now about to start our 3rd Grade year and I'm trying my best to get some scheduling done for our upcoming school year.  After going back and forth between both Simply Charlotte Mason and Ambleside Online, I have settled on AO.

 I'm just really wishing I had discovered AO earlier on as I feel like we will be doing a lot of catch up with some of the recommended books.  Many of the Year 1 books we can easily fit into our schedule on top of the Year 3 stuff, as those weekly lessons are pretty short and we could probably add them without adding a whole lot of extra time to our schedule.   Instead of jumping into the Year 3 right off the bat, I think we jump into many of the Year 2 books and then get caught up as many of the books in Year 3 are started in Year 2.

So far, this is what we will be using in our upcoming school year:

History:
     Trial and Triumph  by Richard Hannula
     An Island Story  by H.E. Marshall
     Fifty Famous Stories Retold  by James Baldwin
     Viking Tales  by Jeanie Hall
     A Child's History of the World  by Virgil Hillyer

American History:
     This Country of Ours by H.E. Marshall
     Benjamin Franklin by Ingri D'Aulaire
     George Washington by Ingri D'Aulaire
     Buffalo Bill by Ingri D'Aulaire

Geography:
     Paddle to the Sea by Holling C. Holling
     Tree in the Trail  by Holling C. Holling
     Seabird by Holling C. Holling
     Home Geography for Primary Grades  by C.C. Long
     Elementary Geography by Charlotte Mason
     Everyday Geography (3rd-5th Grade) from Christian Homeschool Hub

Natural History/Science:
     Handbook of Nature Study by Anna Botsford Comstock
     The Burgess Bird Book for Children by Thornton Burgess
     A Drop of Water: A Book of Science and Wonder by Walter Wick
     Introductory Science by Science Shepherd
     Apologia Exploring Creation with Astronomy by Jeannie Fulbright
     Experience Astronomy Field Guide from Intoxicated On Life
     Close to Home (Things to Know and Things to Do) by Elizabeth P. Lawlor

Literature:
     The Aesop for Children by Mike Winter
     Beautiful Stories from Shakespeare by Edith Nesbit
     Just So Stories by Rudyard Kipling
     Parables from Nature by Margaret Gatty
     The Blue Fairy Tale Book by Andrew Lang
     Pilgrims Progress by John Bunyan  (All In One Curriculum from Answers in Genesis)
     Heroes, or Greek Fairy Tales for My Children by Charles Kingsley
     American Tall Tales by Adrien Stoutenburg

Poetry:
     A Child's Garden of Verses by Robert Louis Stevenson
     Linguistic Development Through Poetry Memorization from IEW

Math:
     Math U See - Beta and Gamma
     CTC Math

Spelling/Grammar:
     Spelling - Lower Elementary List 2 from SchoolhouseTeachers.com
     Essentials - Logic of English
     Grammaropolis.com

Copywork/Notebooking/Handwriting:
     NotebookingPages.com
     New American Cursive Penmanship Program from Memoria Press

Foreign Language:
     Olim, Once Upon a Time..in Latin (for Ashleigh)
     Foreign Language for Kids by Kids Spanish  (for Garrett)

Bible
     VeritasBible.com
     Grapevine New Testament Pt 2
     Firmly Planted:  The Gospels Pt 1 and Pt 2

Art and Music
     Music Appreciation for Elementary Grades by Zeezok Publishing
     Studying the Masters:  12 Great Artists from SchoolhouseTeachers.com 
     ArtAchieve.com
   
Character Building
    Laying Down the Rails by Sonia Shafer
    Laying Down the Rails For Children by Lanaya Gore


As long as this list may look, I know that as the year progresses, much more will be added to this list.. We're already on Week 4 of our new school year and we are already flying through our lessons.  But overall, this is what we have planned at this point in time :) 


Don't Waste Your Money (5 Days of Homeschool 101)


One of the most heartbreaking things about homeschooling is when a parent spends hard earned money (especially when the budget is tight) on a curriculum for their child, only to find out that the curriculum just isn't right for their children.   Add in the frustration of getting a month into a particular subject, realizing it's just not going to work, and then trying to figure out what exactly to do about it and it can send any homeschool family into a tail spin. Do you continue with the curriculum? Do you sell it off in hopes that you can recover the money loss in order to try another?

Nobody wants to be in that situation, so today as part of the 5 Days of Homeschooling Curriculum blog hop, I thought I would give a few tips that I have learned over the last few years to help avoid this major bit of homeschool stress.

#1.  One Price for Everything Membership Is Your Friend

I cannot write enough to praise websites like SchoolhouseTeachers.com that have multiple style curriculum available for the cost of a membership. These types of websites offer a full range of subjects ranging from Core Classes such as Math and Language Arts, all the way to Electives such as Foreign Languages, Photography and Violin Lessons.  A single membership allows members full access to all these classes and lessons to be used by all students in the family.  I find these types of sites well worth the price tag because I can try a curriculum and if I find that it's not working for my kids, I can quickly find something else that does without having to make multiple purchases.  This also allows me to allow both Garrett and Ashleigh to pick subjects that they find interesting that they can do independent from each other without breaking my bank account.  The classes offered are often well planned and new material is constantly added. You just print it out and teach.

#2 Don't let a high price tag necessarily be a deterrent when deciding on a curriculum.

Many times, people get discouraged when they see a curriculum that might cost $99 for one subject. However, before passing on that curriculum, research particulars such as if the publisher allows for families to make copies of the materials for multiple children.  For example, Institute for Excellence in Writing's Ancient History Based Writing Lessons in Structure, Style, Grammar and Vocabulary will run you $50 for the Teachers Guide and Student book combo - which is very reasonable.  IEW is VERY generous when it comes to making copies of their material so this 50 dollar curriculum can easily be used for two students at one time or for using with multiple kids over a long period of time.  When used between 5 students, that 50 dollar curriculum suddenly equals less than 10 dollars per student (since part of that cost includes the teachers guide) for a multi-subject curriculum.

#3 Know that Just Because Your Friends Like it/ Hate it Doesn't Mean You Will

I am so guilty of this and I had to learn this particular lesson the hard way (and with plenty of money lost). If you frequent any of the homeschool facebook groups or forums, you'll constantly see people asking for suggestions for a math program, history curriculum or Grammar program.  Everyone will be quick to recommend the program they are currently using or say what didn't work for them.  Take all of these recommendations with a grain of salt - what works for one (or even 100) won't necessarily work well for your family.  Use these suggestions as a platform to research a curriculum, but don't buy a program just because it comes highly recommended.

#4  Know your Student's Learning Style

If your child is more of a kinesthetic/visual learner (meaning they learn better when they can put their hands on things), MathUSee with it's hand on block system might be a better math curriculum for your child than a more reading/instruction based system, even if the other curriculum comes highly recommended. A visual/Auditory learner might fare much better with an online video style curriculum than they will from a workbook/textbook style curriculum.  Take a bit of time to observe your students (as not each one will have the same learning style) and learn their learning style before shopping for a curriculum.  By understanding how your student learns best, you'll be able to match a curriculum they will get the most out of.

These other four all lead to the most important:

#5  Do Your Research

I can't say this enough - don't rely on others opinions to sway where you spend your money.. Order catalogs from the various publishers and download the sample pages they offer on their websites. Visit review websites like The Schoolhouse Review Crew to get non-bias opinions of the curriculum you are interested in.  Attend homeschool conventions and actually get your hands on the curriculum.  Never buy a curriculum on a whim, you'll almost always regret it in the long run.  Also, when you do find a curriculum you have fallen in love with, research if there are any available discounts available. Many companies, such as Alpha Omega Publishing, offers discounts for military families, for example.


By keeping these four tips in mind when shopping for curriculum, you can help reduce the risk of ending up with a curriculum that you or your kids absolutely hate.

5 Days of Homeschool 101

Tuesday, August 2, 2016

CTC Math (A Schoolhouse Crew Review)


It's not a secret that the one subject we struggle with is mathematics.  We've tried many various math curriculum with mixed results - some worked out good, others just were not a proper fit for my kids. Last year, however, we were given the opportunity to review CTCMath.  This was one of the better fits for our family and I honestly feel that it was a huge factor in my oldest daughter passing her high school math course that she had been struggling with.  When we were given another opportunity to review the one year subscription of CTCMath Homeschool Membership, I was pretty thrilled.  We were given access to the program for up to 10 students. 


CTCMath is an online math curriculum that covers all math concepts, from Kindergarten all the way to higher level mathematics such as Trigonometry and Calculus through more than 1,367 animated and narrated video lessons. These math concepts are not aligned with common core as CTCMath believes in teaching math the traditional way.  Each student has access to all grades of math as part of the subscription and can easily switch between the various levels with little trouble. This proves to be very useful for older high school students who might be learning concepts that are both Algebra 1 and Algebra 2 during the same year. You can also easily jump students from grade to grade rather than having to buy a separate grade level for more advanced lessons. 

For grades Kindergarten to 8th grade, CTCMath can be used as a full mathematics curriculum. For high school math, CTCMath recommends that their website be used more as a supplement in addition to another math curriculum. 

The program is completely browser based and requires no computer instillation. I ran it  Chrome without any problems or glitches.  In the past, I was also able to log into the program with my Kindle Fire without any problems.  CTCMath's website says it should run on all HTML5 platforms such as Ipads, Iphones and Android devices, making it convenient for lessons on the go, such as in a doctors office or while riding in a car..

Since the last time I reviewed the program, there have been many changes made to the website. First, the overly colorful menu is gone and has been replaced with a very clean, more institutional looking white/grey screen. While the lessons still consist of the videos followed by answering questions, I did find the new formatting to be much easier to navigate (although, to be honest, the old format was easy to navigate as well). Also, a major addition was the ability for the parent to add Tasks for the student to work on.  These tasks, once scheduled, would show up on a tab at the top of the student's worksite.  While I personally did not use this feature during our review as I typically sit with the kids while they are on the computer, I can see how it would be very helpful for students who can work independently but still need some direction. 


In all grades, students are presented with a video lecture that shows the concept for that particular lesson. These videos are very short, on average less than 5 minutes. Examples are given along with very detailed breakdown of the answers. In lower grades, the lesson is followed by a series of questions (around 10 to 12 questions) that reinforces what they just learned.  Extra questions are provided as an option if the child did not do well on the initial questions and might need extra review. Feedback is immediate as the answer will be marked right or wrong and the correct answer is given. After all questions are complete, a printable copy of the questions along with the child's answers is provided which can be printed out for record keeping (something I think is great).  There is a bank of more than 57,000 interactive questions throughout all the grade levels. 

In higher grades, after the video lecture, the student is provided with a worksheet that they can print out and work offline. Once completed, they can record their answers in the website and have their answers graded. By default, the student must score a certain percentage in order to obtain a passing grade on these worksheets or they are told to try again. 


The last time we reviewed CTCMath, we used it strictly as our math curriculum using the 1st and 2nd grade levels.  This time around, as we were already established in another math curriculum that the children were both doing well with, we decided to use CTCMath as a suppliment to reinforce what they were learning with the other program.  This worked out really well for us, especially for Garrett.

For example, one of the hardships with Garrett's autism is that he struggles with math concepts that are not exact - most notably with rounding numbers.  Try as we might, no matter how many times we explained and reexplained and reviewed, Garrett just could not wrap his mind around the concept of rounding.  To him, it goes against the exactness of math. 

Luckily, there was plenty of material on rounding numbers on the CTCMath program.  I sat down with Garrett and together we watched the video lesson and then Garrett did the practice questions.  To my surprise, he got all but one correct.  The next day, we again watched the video and again he did the practice questions - this time he got them all right. The ability to switch between the various grade levels was helpful, as a few of the rounding lessons were considered 2nd grade and a few were considered 3rd.   Since then, he has not struggled with rounding at all.  The way it was presented in the video was perfect for him and allowed him to easily understand the concept where I had failed.  

As they proceed through the program, students are graded as either Platinum, Gold and Silver based on their average grade from all tasks in each set of lessons. Platinum is awarded when a student gets 100% for the entire set. 


One of the many pluses to CTCMath is that tracking your child's progress is very easy. CTCMath sends progress reports to the parents email on a weekly basis letting you know how many times the student logged in, for how long, what they did while they were logged in and how they did on what they worked on, This same information can also be accessed from the Parent account which gives quick access to all students currently enrolled in the program. From the parent login, you can download these reports as a PDF file for your records. 


CTCMath is a product I can honestly recommend.  In the time that we have used it, it has helped not one but two of my students understand math concepts that otherwise would have been lost. 


For more information about CTCMath, visit their website or any of the following social media sites:


CTCMath (US and Canda)


Maths Online (Australia Only)


CTCMath Review

Monday, August 1, 2016

America...The Beautiful


My bucket list is pretty short.  A few things I missed the chance of seeing, like watching a Space Shuttle launch in Florida. However, most of my list consists of visiting National Parks and a few foreign countries such as Ireland and Scotland.  One of the things on my list has always been Yosemite National Park. This past week, I not only got the opportunity to cross this off my list, but I got to spend the week allowing my children to take their classroom out of the Mojave Desert and instead bring it into one of the most beautiful places in the country.

Sunday afternoon, we loaded up the car with my husband, my three children, our dog and our two tortoises and we made the 6 hour trek north to spend the week camping in the beautiful Yosemite National Park. We had made arrangements to stay overnight in Fresno and then finish the last 3 hours of driving Monday morning to allow us plenty of time to get checked in, set up camp and get situated. Even in Fresno, the smoke cover from the Sand Fire in Santa Clarita was very strong .

Exiting in Fresno at Sunset with the smoke in the background.
 Reservations for Yosemite are hard to come by and require booking 6 months in advance - even then, I was only able to find one campsite that had availability located at the northern border of the park.  However, Hodgdon Meadows proved to be a lovely campground located at an elevation of 4,900 feet.  The campground was located about 42 miles from the Yosemite Valley which meant that we had the pleasure of driving through the valley and getting a "sneak peak" ahead of time.  We all commented on the wonderful smell of pine and how fresh the air was, especially after a week of smelling the smoke from the Sand Fire, which we live very close to.  With all the curvy roads, my husband was having a ball driving our AWD Forester while the kids and I took in the sites.  Our drive first took us through the Sierra National Forest before we actually entered the Yosemite park.  Because my husband is a active duty member of the military, we had been given a free annual pass for all National Parks and Forests last year when we went to Sequoia National Forest and so we were admitted to Yosemite for free.  Otherwise, the park charges 30 dollars to enter in a personal vehicle

.

We arrived at Hodgdon Meadows at around 1pm, got checked in and started setting up our campsite.  When we camp, we actually camp, we don't "glamp" as they call it.. The only real luxury we take is air mattresses instead of sleeping bags - beyond that it's a tent, a camp stove and an ice cooler stocked with food for the trip.  

Once the tent and the campsite was established, it was time to collect firewood for the camp fire.  While most camp sites in the Yosemite valley requires you to purchase wood as almost everything is protected, the wood in Hodgden Meadows and the border between Yosemite and Stanislaus forest are not, so we were allowed to venture out and collect wood from the surrounding area.  The only requirement was that the sticks must fit into the fire pit without any overhang (for safety reasons).  There were also no restrictions on when we could burn a fire so we were able cook our meals on the campfire - other campsites had a restriction stating fires could only be burned during 5pm to 10pm. 

Charles collecting Firewood

Getting the tent set up
One of the gifts that I gave Charles for Father's Day was a hammock.  This turned out to be the highlight of our campsite for the kids as they used it almost constantly while in the camp site - from the minute they woke up til the time we retired for the night.  Poor Dad didn't get near as much use as he would have wished since they hogged it most of the time.  (I will most likely purchase a 2nd hammock for the kids before our next camping trip).


The first day of our trip, we basically stayed at our campsite and relaxed.  There was another campsite close by that had a number of other children and they invited the kids over to do some arts and crafts with them. While Garrett declined (he's not the artsy type), Ashleigh and Alyssa went over to the adjacent campground to make friends and make some glitter artwork while Garrett looked on. 


Ashleigh's Finished Art Work
Garrett, being the boy that he is, had fun playing on a stump and getting dirty..   This gave me the opportunity to take what turned out to be one of my favorite photographs of him - dirty face, dirty jeans and his shoes untied but happy and content out in the great outdoors.


For dinner that night, we roasted hotdogs on the fire and then followed up with making s'mores.  Once it was dark, the kids sat in the hammock swinging and singing many of the folk songs that we have learned over the last few months such as The Sky Boat Song, Down by Salley Garden, and The Lion Sleeps Tonight along with many other random songs. We also spent some time reading from a few of our books and listening to stories such as "How the Leopard Got It's Spots".    Around midnight, we put the fire out and called it a night. 

Day 2

Rise and Shine.....We managed to sleep til about 9am after a pretty good night's rest.  The kids instantly went to the hammock while I made camp coffee and Dad got more firewood for a small fire to make breakfast.  With the fire going, we threw foil wrapped breakfast burritos on the fire for a few moments and had a nice hot breakfast along with some java to get the day started. 


With temperatures in the low 90s, we opted to head about 12 miles up the road into the Stanislaus National Forest to a swimming hole called Rainbow Pools. Rainbow Pools is a natural swimming hole on the south fork of the Tuolumne River and is a hidden gem located off of Hwy 120 - if you don't know it's there you'll pass it without every realizing it.  The water is cool and clear and it's even dog friendly so Kenny even got to get a bit of swimming in with us.  None of us were brave enough to climb the granite cliff and plunge into the pool but we had lots of fun swimming and watching other people jumping.  


After a few hours of swimming, we headed back to camp for a lunch of Frito Pies and we started our daily camp preparations of collecting firewood, cleaning dishes, collecting water (the campsite had a well on site) and other necessities needed to be done before the end of the night.  Dad and I also had to head to a nearby General Store located about 6 miles from our campsite to get ice to refresh our cooler to keep everything cool for the remainder of our trip as well as get gas for the car to make the trip to the valley the next day.  We also enjoyed admiring some of the wildlife visiting our campsite such as the Stellar Jays, White Headed Woodpeckers, Velvet Ants and Squirrels as well as enjoyed the antics of the eating tortoises. 

White Headed Woodpecker

Stellar Jay
Tortoises
Squirrels
For those unfamiliar with Velvet Ants - I will give you a warning.  They are not ants but are actually a variety of wingless wasps often referred to as Cow Killer Ants.  They can be any color but typically have either red or orange fur on a black body.  These guys pack a pretty nasty punch so they are not something you want to pick up and handle, however, for the most part they are non-aggressive and are easily watched from a safe distance.

Velvet Ant (Do Not Touch - it's actually a Wingless Wasp)
Once Dad (with the help of Garrett) got the fire made, we enjoyed a dinner of turkey burgers and bbq chips along with more s'mores for dessert. Even Kenny got a few marshmellows (no chocolate for the doggy) and disagreed when we told him he couldn't have but a couple.  The night was spent once again enjoying a campfire, singing songs and telling stories and just enjoying being a family together. 

The Men Folk Making a Fire


Day 3

Day three was what everyone was looking forward to - the day we went to the Valley.  Once again we were up around 8-9am and enjoyed another breakfast on the campfire - this time some sausage, egg and cheese breakfast sandwiches I had made ahead of time on English Muffins and wrapped in foil. While we were eating, we were watching the antics of the squirrels who were invading an adjacent campsite that had been left unattended - more about this later.  Once we were filled up, we loaded up the car and headed down to the valley.  

We started our exploration by just driving around and checking out the Half Dome Village and Yosemite Village as well as observing El Capitan which soared about 3,000 foot over our heads.  After driving a bit, we decided to hike up to the Bridalveil Falls observation area.  (We were limited where we could hike as many trails do not allow dogs). 

El Capitan

A Small Church located near Half Dome Village

Bridalveil Falls Seen from a Distance
Bridalveil Falls from the Observation Point
 After being in the valley for a bit, we headed up towards Glacier Point, a picturesque observation trail 7,214 feet above the valley floor.  This point gives a great view of Yosemite Valley, Half Dome, Nevada Falls, Vernal Falls and Clouds Rest.

Driving to Glacier Point


Half Dome

Nevada Falls (upper falls) and Vernal Falls (Lower Falls)
After several hours down in the valley, we headed back up to our campsite.  Remember those squirrels I mentioned?? Well, they had done a number on the neighboring campsite.  They had failed to secure their belongings in the bear box and the squirrels had raided their campsite.  There was paper towels, toilet paper and other stuff scattered all around.   The owners of this site didn't return til around 10pm that night and found this mess, I almost felt sorry for them.
Squirrel Raided Campsite
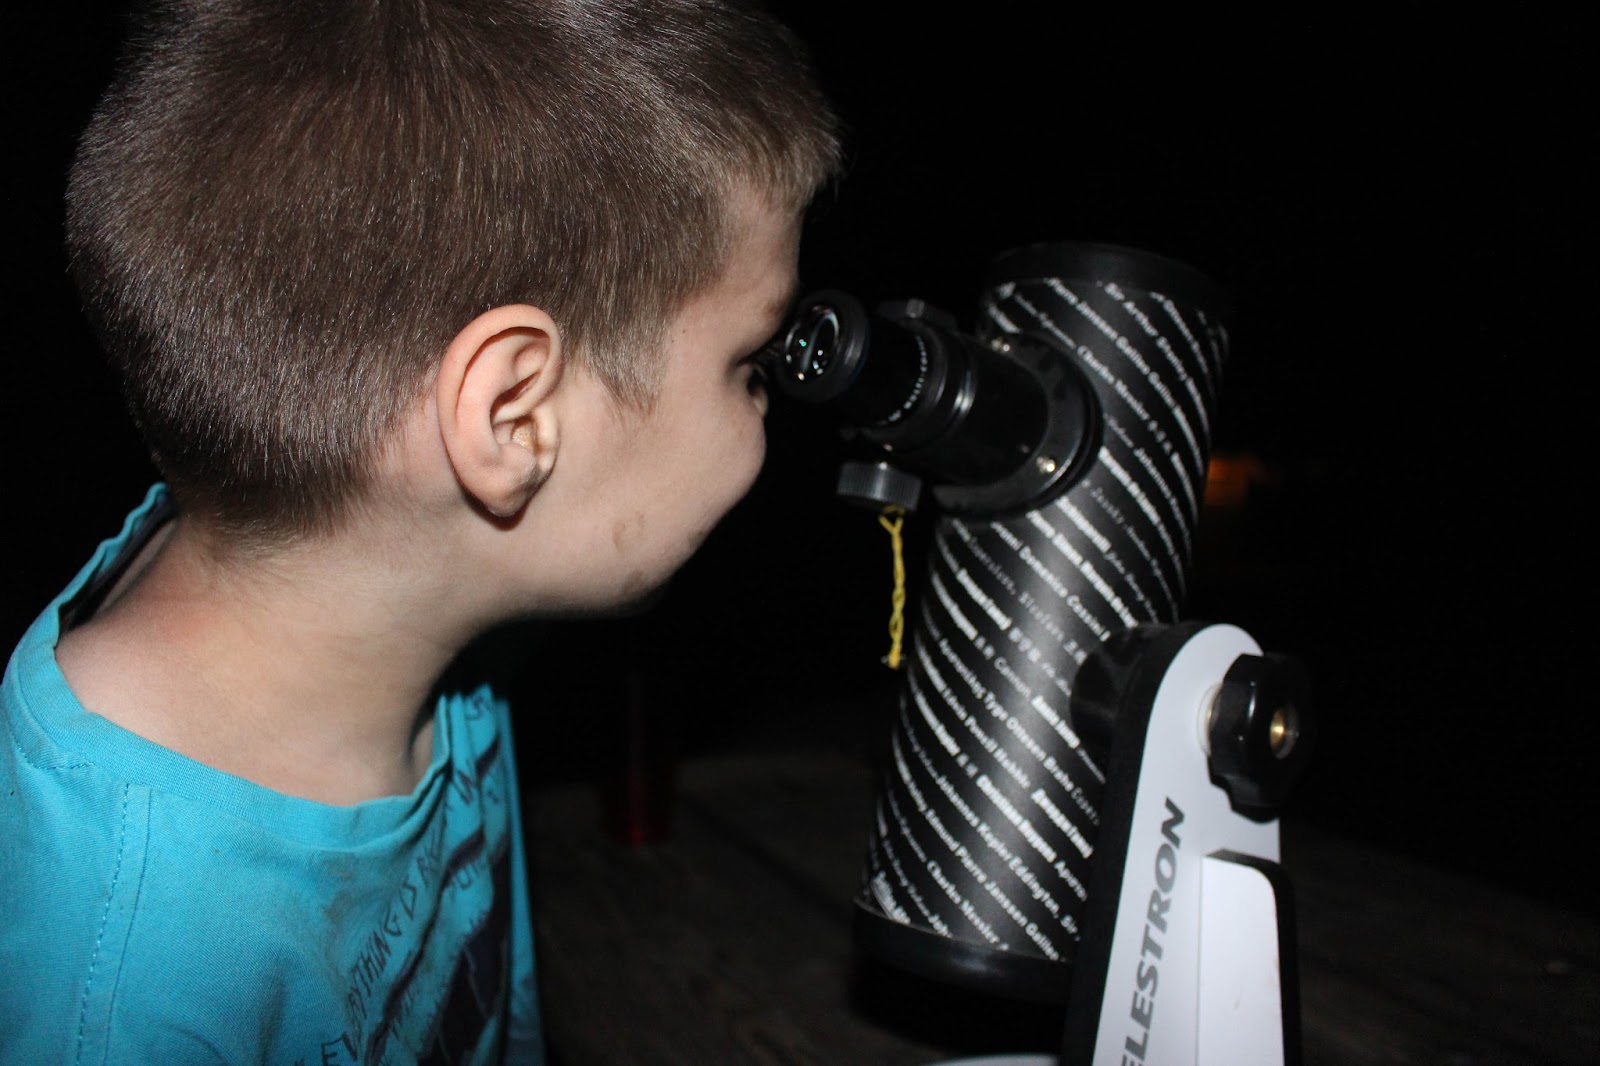
After a dinner of bratwurst and camp potatoes and more roasted marshmallows (we ran out of chocolate for the S'mores) we sat down and had a lesson out of our Apologia Astronomy book.   We decided since we had such a great view of the starry sky, we would skip to the lesson about the stars.  After learning about the Big Dipper, Polaris (the North Star) and Sirius, we located them in the sky above us.  We also broke out our small telescope and looked at some of the star clusters we could find overhead. 


Our astronomy lesson worked out PERFECTLY for us that night.  First, with such a dark sky, we were able to find the International Space Station as it flew overhead and watch as it made its way across the sky. However, about 90 minutes later, we saw a fireball in the sky.  As we watched it, it grew brighter.  It took about a minute from the time we noticed it until it was out of view.  While we had no idea specifically what it was, we knew it was most likely some sort of "space junk" reentering the Earth's atmosphere.


Since we had no internet access where we were, we had to wait til the following day when we on our way home, when we discovered that what we had observed was a Chinese CZ-7 rocket that had launched a few days before.  It was a really cool experience to get to see it. 

Unfortunately, the next day it was time for us to head home.. We had a breakfast of oatmeal (I had made "instant" packets ahead of time with old fashioned oats, chia seeds, protein powder, powdered milk and brown sugar) along with more coffee and then broke down our campsite.  We have a rule that we always leave our campsite better than we found it so we spent a bit of time picking up all the litter we could find.  Check out was at 11am, so after a final look around, we said farewell to our campsite and started our 6 hour trek back home - not hotel stop this time as my husband had to work the next day.

But we did get one final picture of Yosemite before heading out. 

God's Paintbrush is AMAZING!!


This post is part of the the Homeschool Review Crew's Field Trip Inspiration Round up. For other great field trip ideas from around the country, be sure to click the image below :)

Field Trip Inspiration {Round UP}

Disclosure

Disclosure
Related Posts Plugin for WordPress, Blogger...